Showing posts with label photography. Show all posts

Friday, October 5, 2012

Tip – Buying a Digital Camera


Looking for a new digital camera?  It’s not as easy as just walking into the store and buying one.  There’s lots to consider – optical zoom, digital zoom, mega pixels, memory cards.  What does all this mean and which should make the most difference to me? 

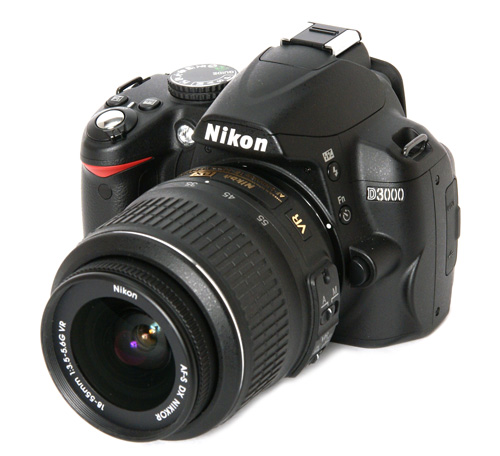
First I had to decide the type of camera I wanted: a point and shoot (does all the work for me and fits in my pocket) or digital SLR (a bulkier camera but you can interchange lenses to get very wide or extremely telephoto shots).  My criteria: compact, easy to use, point and shoot, affordable, and sharp clear photos. 

I discovered that mega pixels was a concern a few years ago, but now many point and shoots start at 10 mega pixels and go up to 16 mega pixels.  Mega pixels are all those little dots that make up a digital picture which determines resolution.  The fewer the dots and the larger the picture, the grainier the picture is. A 5mp to 8mp is good for the average shutterbug.

I found this helpful chart online that gives the minimum mega pixels for quality prints.

Max Print Size
Minimum MP
Resolution
4 x 6″
2 megapixels
1600 x 1200
5 x 7″
3 megapixels
2048 x 1536
8 x1 0″
5 megapixels
2560 x 1920
11 x 14″
6 megapixels
2816 x 2112
16 x 20″
8 megapixels
3264 x 2468
16 x 24″
12 megapixels
4200×2800

Next I discovered that the debate over digital zoom and optical zoom is unnecessary.  Ignore information about digital zoom in advertisements.  All it does is crop the image in the camera and you can do that yourself with your own software after the picture is taken.  Ask about how to turn off the digital zoom to maximize use of the optical zoom.

What you do want to pay attention to is the optical zoom which involves a physical lens magnification of the image you are photographing.  For example, 3x zoom will make your subject three times as big.  

Optical Zoom vs. Digital Zoom 
How much do you need?  2x-3x is good for photos of friends or family.  5x+ is best for outdoor scenery or architectural details.   7x+ may be needed for wildlife or sporting events.

Taking photos inside shadowy cathedrals or other low light locations is a concern for travelers so considering ISO (or light sensitivity rating) is important.  Look for an ISO that goes up to 1600.  Anything over that is unnecessary for most average photographers.

Other items to consider are the extras.  Check to see what kind of batteries the camera needs: regular AA, specialty, or rechargeable (and then a recharger is needed).  Also check to see what kind of memory card the camera uses - can you use the ones you already have, the price of replacements or size of cards, and whether or not they fit into your computer to upload photos.  My new laptop does not accept my old memory cards.

Also consider how your camera will upload photos to your computer – memory cards, USB cord, etc. 

A good web site to visit to compare various cameras is pricegrabber.com.  This is a good site to find the best deal on cameras (or on any item), and pay attention to the feedback ratings. 

Finally, if you are considering purchasing a new camera before our trip, don’t wait until the last minute.  Don’t let the trip be the first time you use your new camera.  You want to get it in plenty of time to practice with it extensively, learning all the little features, before we depart. 

You do not want to spend your trip trying to figure out what button to push or worse get discouraged and quit taking pictures altogether.  You will want to capture every memory.

Tip #1:  Here is a tip I’ve learned from personal experience.  I have found that the more times I transfer a photo, the lower the resolution or quality is when it finally gets printed.  For example, I take a photo with my camera, I transfer it to my computer, then I edit it in a software program, then I send it to Walgreens via the internet, and then they print it…the quality decreases with each transfer.

Now consider if the photo is taken on an iPhone, then goes through a text message, which gets saved onto another iPhone, that then gets put on FaceBook, then gets saved on someone’s iPad, and then emailed to the home computer to then edit in software, then sent online to a photo developer….whew!  Don’t laugh!  I’ve done this and been very disappointed with the end product.

Tip #2:  Many tourist spots, like the inside of cathedrals and museums, don’t allow inside photography.  Here are 3 possible solutions:  1) buy a postcard of the site as most are 4x6 size and fit right inside the photo album; 2) take pictures of postcards in the gift shop with camera’s macro setting; or 3) find the shot you are looking for on the internet, edit it for size in your software program, and print.  I’ve done all three and they all work great.

Tip #3: Planning to use your iPhone as your camera?  Here are some cool apps to enhance your photographs.  1) Photosynth (free) will stitch together your photos in a seamless panoramic image.  You can share 360 degree views with friends and family back home while you’re still enjoying the rest of your tour.  2) 100 Cameras in 1 ($1 or free for 20 effects) bundles filters, effects, and overlays.  3) Splice (free) allows you to take several still photos and videos and splice together to make one continuous video.

Friday, July 13, 2012

Really Cool Travel Photos


Sometimes it is just plain fun to look at exceptional travel photos.  This first site is a slide show from Budget Travel entitled “25 Most Photographed Places.” The really cool feature to this slide show is that after each photo of a cool place, there will be another photo of the same place but from a unique perspective, position, lighting, etc.

So go through the entire slide show, take note of the tips, practice up on your photographic techniques this coming year and be ready to take some awesome pictures! (Note: #23 is the Brandenburg Gate in Berlin and my favorite is #38—way cool!)

The next site is absolutely breathtaking photography!  It is 360 degree aerial 3D photography by AirPano of some of the most unique sites in the world.  You simply have to see them to appreciate the clarity.  They were taken with a miniature aerial helicopter equipped with a camera.

Unfortunately not one is of any of the sites on our upcoming tour, but if you’ve traveled with me before you will recognize several and perhaps others you have traveled to yourself.  Just click on the triangle inside the circle and move your mouse in all directions.  Click on iPhone or iPad if you are viewing in those formats. (Note: I found it worked easier on the iPad.)

Panoramas DK is unbelievable!  It has SO many wonderful places to visit.  Again not many from where we are touring except for Berlin Potsdamer Platz.  You really must look at Versailles Hall of Mirrors France.  It’s almost like walking the hall again!  And use your mouse to scroll up and view the fabulous ceilings! (Note: You will need QuickTime to view this site.)

This site, 360 cities, has a panorama view of Prague.  There’s also one of Auschwitz-Birkenau.  Scroll down on this site to see other panorama views at the concentration camp.

Interested in creating your own panorama?  Here are 8 tips on how to do just that.  Autostitch is a free panorama software download. With only 11 months left before we leave for Eastern Europe, you’ve got a little time to practice!

Tuesday, July 5, 2011

Sharing Trip Photos

Now that you are home and rested, it’s time to play with those thousands of photos you took of beautiful Greece! Here are a few options for you (the titles are links to the sites):

A. WALGREENS – I created a photo sharing site on Walgreens just for our tour. Go to the Walgreens site , click on Photo at the top, and login at the top right with the username and password I sent you in an email. To upload photos you took for others to see (and share!), just click on “Upload Photos” in the upper left under Photo Home and click Agree to the Copyright Statement.

Name the album with your name, pick a date and write a description, then Select Photos. Now go to your trip album on your computer and hold the shift key to select multiple photos at one time. Each one will load into your Walgreens album.

You can order from Walgreens directly from your computer (I love this feature as I sit at home in my PJs and edit pictures, send them to my local Walgreens, and they are ready in an hour to pick up…and I can pay in the store! Way easier than sitting for hours in store.) And many times Walgreens offers 10 cent prints via email messages (I just get photos ready to print and let them sit in a folder on my computer until I see a deal and then they are ready to send at a minute’s notice).

I also like that sometimes Walgreens offers email deals for a free 8x10 or a free collage photo. No other purchase is necessary. I just send it through my computer at home and go pick it up…for FREE!

But you do not have to order photos from Walgreens that others upload to our site. To view any album, even if you do not upload any photos, simply login and click on any album to view photos. You can click on View Slideshow to see all the photos in an album, or just click on any one photo to view larger. If you want to choose a photo to add to your own album on your computer, simply click on the photo to make it larger, then right click on the photo and choose “Save Picture As…”, find the folder on your computer, and just make sure it saves as a .jpg. Then print as you please.

B. PICASA – I like using this free photo editing program from Google. I especially like it because it allows me to lighten those photos I took that are too dark (no flash allowed places) and actually see what was inside. It also will let you straighten a photo when you were a little crooked when you took it so all buildings don’t look like the Leaning Tower of Pisa! I also like that I can crop out unwanted items, too much sky, or zoom in to the main feature of a photo. When I get through editing, I appear to be a much better photographer than I really was!

Other features include adding sepia tones, making it black and white, and other color enhancing tools. I like that it will crop my pictures to exact print sizes…4x6, 5x7, 8x10 because a digital camera usually takes a more square photo, but that is not the size that is printed commercially or that fits into albums or frames. It lets you choose what you want cropped out of the picture rather than the photo printer. What it will not do…clear up your blurry photos. Sorry!

C. SMILEBOX – This free site is like an online scrapbook. You take your online photos and videos, add their designs and music and create slideshows, scrapbooks, greetings, photo albums, invitations, and collages. You can share your creations on Facebook, email, blogs, print at home or store, or burn to a DVD. It’s fun to play with and easy to use. I used it as our Christmas greeting on the blog last year and it would be perfect to share your favorite trip photos with friends and family.

D. PHOTO STORY 3 – This free download for creating a slideshow with your trip photos adds another new dimension…your voice! Easy to use, Photo Story 3 lets you add your photos, music (theirs or your own), and record your voice narrating each photo. This is a fantastic way to work in all those fun stories that a photo reminds you of. For complete details on how to use this tool, go to my library technology blog LUV2LEARN2.

E. TRIP WOW – This free slideshow creator from Trip Advisor adds another unique feature. In addition to putting music with your photos, you can also create an Indiana-Jones style animated map that shows our route on the trip!

You can download the slideshow you create on the site to your computer or burn it to a DVD. You can also share with family and friends via Facebook, email, or another web site.

Enjoy!

Tuesday, June 7, 2011

Photography Tips

Always take the traditional postcard photo of all the important sites, but don’t forget to take plenty of pictures with people in them too. After all, it’s the friends we make that also make the trip. And of course, you want the “I Was There!” photos too. With digital photography and plenty of memory cards, you can take as many pictures as you want!

Budget Travel magazine in their March 2011 issue offers some tips to perk up your photo album:

1. Group Portraits – do something different! Traditional stare at the camera over someone’s shoulders does say you are there, but not how much fun you are having. Ham it up!

2. Food/Meal Photos – Some of our travelers take pictures of every meal because someone is always asking what they ate while they were there. Try something new. Avoid looking straight down on the plate. Shoot at an angle to get the entire place setting. Use your camera’s macro setting (look for a flower icon) to capture the textural details of food.

3. Hotel Room Photos – Lamp light rarely provides enough light. Check out when you have the most natural light (hard to do in a cruise room with no window, right?), but you can do so with the hotel. Mornings and evenings usually provide the most sunlight, so open the curtains and turn off the flash. Better yet, also capture something local through the window as you shoot from an angle, but not directly out the window.

4. Panoramas – It’s hard to get a sweeping effect in one measly photo; everything is so tiny it loses its effect. See if your camera has a stitching function (see your user manual) and take several pictures that “stitch” together to create one large panorama. Even if you don’t have that function, try sitting your camera on a ledge or other steady surface and move it slightly to get the bigger picture. Then put the pictures together yourself.

5. Don’ t just shoot the “big picture” of the Parthenon or other iconic structure or scene. Yes, do get that photo, but then focus on the smaller details (statues in niches, carvings, trim, towers, doors, etc.) and snap those photos too. You simply can’t see all that in the big picture.

6. Reflections – Try shooting the photo with just the reflection instead of the object and its double. Add another element to the photo for something really interesting.

7. Flash – Turn it off when shooting through a window to avoid glare.

8. Flora and Fauna – It’s a family joke, but one we put into practice. We never take trip photos that we don’t cover the flora (flowers in the church garden) and the fauna (any animals we see).

Rick Steves, the travel guru, also offers some photography tips:

1. New angle for an old sight – Again you always want to get the classic postcard shot, but look for a new and unique angle for additional shots. Shoot a bell tower through a horse’s leg (statue!) or lay your camera on the floor to shoot a beautiful ceiling. Think outside the box.

2. Capture the personal side of your trip – Don’t forget to shoot the locals…and you interacting with the locals…or the picnic on the beach…or the sunset over your shoulder (get a friend to do that one!)

3. Vary your perspective – Shoot close, far, low, high, day or night. Don’t always center your shot. Use something in the foreground to add color or depth, like flowers closeup and the site in the background. Catch the reflection of a site in someone’s sunglasses.

4. Break the rules – Sometimes shooting into the sun makes a great silhouette. Experiment with existing light.

5. Best lighting – Early morning and late afternoon. Take advantage of it

For more photography tips, go to the LUV2GO archives on the left for Februrary 9, 2009.

Telling the Digital Video Story

So, you’ve decided to take the photography plunge and record your trip via video. With lots of tiny foolproof video cameras out there (the flip video, for example, or the video feature on your digital camera), taking video is not as cumbersome as it once was.
Here are some tips for shooting better videos as shared by Budget Travel magazine July/August 2010:

1. Tell a story – Every video should have a narrative (beginning, middle, and end). Record you getting ready and at the airport, fun action times on the trip, and you asleep on the plan home!

2. Video at the right time of day – The best light is early morning and late evening. Of course, that doesn’t mean ignore the rest of day!

3. Interview other people – Even though there are times when you will narrate, also get some fellow travelers to talk you through a site…or better yet , persuade them to video you narrating a fun time!

4. Use the zoom – Zoom in from a wide-angle to a close-up, or zoom out from a detail to the full scene. You don’t have to stay at the same perspective all the time.

5. Be your own tripod – Shaking in video is annoying. Reduce the movement by keeping your knees loose and your feet wide. Filming with one hand? Brace your other arm across your chest for stability.

6. Be patient – Take the time to line up a good shot.

7. Back home…and editing – When putting together a video that is interesting, be prepared to cut. Think about when you look at others videos…and wish they had edited hours of static mountain shots!

8. Set the mood – consider adding a music soundtrack to your video. Some video editing software allows you to add voice-overs after you get home.

9. Make it a real docu-video – Some editing software allows you to insert graphics (say a map) and credits at the end. Here are some samples of free video editing software to download. And more free video editing software...this site is overload! But you might find something you like.

Saturday, April 11, 2009

More Photography Tips

--After stopping at a popular attraction and returning to the parking lot you are met with a sea of buses. Forget what yours looks like? At the beginning of the tour take a digital picture of the bus and the license plate. When in doubt...check your camera! This also works great if you are using a rental car.
--Show and tell: Asking for help in another country can be tricky. Create a photo album on your digital camera or cell phone of basic necessities like a bottle of water, a toilet, a taxi, stamps, etc. Show a local a picture and voila! Instant communication!
--Take a picture of the full front of each hotel and a close-up of the name of the hotel. If you forget a hotel business card, then maybe a taxi driver can get you home with the photo.
_

Monday, February 9, 2009

Travel Photography


Digital cameras make taking travel pictures quick and easy. One of the best advantages is that you can snap and snap and later delete all the ones that didn't work. Maybe these additional tips will be useful.

1. Don't skimp when it comes to buying extra memory cards. If you run out, you'll stop shooting or be forced to erase other pictures. And bring extra batteries too. Always have several ready just in case your charger doesn't work well overseas.

2. Know your camera. Don't wait until you are ready to take that shot to try and figure out what all the dials and symbols mean on your camera. Study the User Manual before you go. This article Take Your Best Shot from Budget Travel tells you how to use 7 settings for better quality pictures: panorama mode, landscape mode, fill flash, macro mode, high ISO setting, long exposure, and slow-sync flash. There's a page 2, so click at the bottom of the page for the entire article.

3. It's taken me a long time to learn that people shots are the ones we like to look at. Include some closeup shots of the locals as well as you and your friends. View all of Rick Steves Travel Photography Tips by scrolling down about 2/3 of the page to read Tricks for a Good Shot.

4. Include a variety of shots to make your photo album, scrapbook or slide show more interesting. Even though Rick doesn't suggest taking a photo of the Eiffel Tower, take that classic shot anyway, then take it again from a variety of angles -- both close up and far away. Interesting pictures include some closeup details of buildings that might otherwise seem uninteresting. And we always try to include what we call "flora and fauna" shots in our albums -- pretty flowers and animals. Variety in composition will make your photo collection more interesting.

5. Inevitably some of the sites we want to capture will be from the bus. Don't hesitate to shoot through the bus window, but turn off the flash which will reflect off the glass and distort the picture. Also try to wait until the bus stops if you can. If you are trying to take something right next to the bus while it is moving, it will probably by blurry. If it is farther away, it will probably be clearer. Regardless take several; you can always delete.

6. And don't forget perspective. Don't be afraid to bend down and take the photo up from a lower angle or stand on something and take it from a higher angle. All make interesting pictures. Take a look at this Perspective Gallery of Photos to see what I mean.

7. Learning some basic composition rules will also improve your photography and make your photos look more professional. Try out these Tips and Tricks for Photography Beginners and learn more about the rule of thirds, framing shots, and leading lines that will make your photos look like picture postcards.

8. And if you'd like an alternative to putting your printed photos in an album, then watch this Common Craft video about Online Photo Sharing in Plain English and discover how you can easily upload your digital photos to the internet to share with others.